Linux Server Hardening Guide: 8 Baseline Security Standards for Businesses
A comprehensive 8-step guide to hardening production Linux servers (Ubuntu/Debian) to protect company data assets and uphold statutory compliance standards.
Quick answer
What to know before reading further
- Linux server hardening is the disciplined process of strengthening an operating system's baseline by closing unused network ports, enforcing SSH cryptographic key authentication, restricting root access, establishing firewall boundaries, and automating security patches to protect vital corporate data assets.
In modern cloud computing, the ability to provision compute resources on demand is a remarkable operational asset. Within minutes, a brand-new Virtual Private Server (VPS) or cloud instance can be activated and ready to accept configurations.
However, standard Linux distribution images provided by hosting platforms are inherently engineered for rapid deployment and accessibility, not for out-of-the-box enterprise defense. The moment an instance is assigned a public IPv4 address, it enters a shared public network environment that demands structured security safeguards.
Server hardening is the methodical practice of tightening an operating system’s configuration to minimize its attack surface. For growing enterprises managing proprietary databases, customer records, and operational platforms, establishing a hardened environment is both a technical best practice and a legal responsibility under modern data protection frameworks.
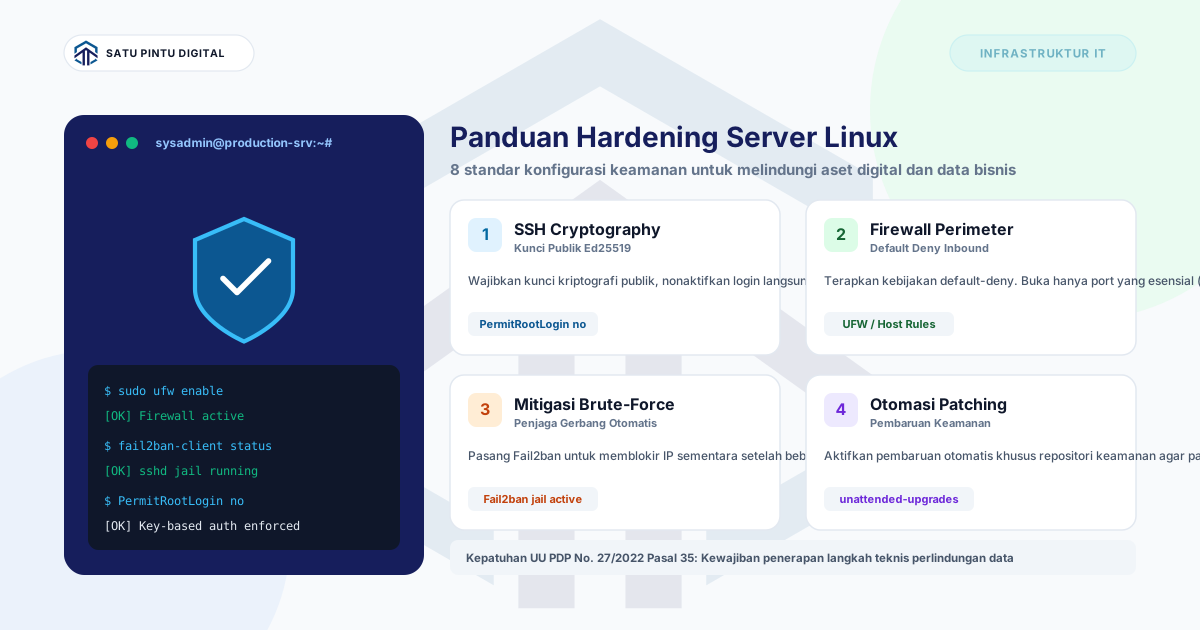
The following eight-step checklist outlines the baseline hardening standards recommended for production Linux servers (Ubuntu/Debian).
The 8-Step Enterprise Linux Hardening Framework
┌─────────────────────────────────────────────────────────────┐
│ 1. Cryptographic SSH Keys → Enforce Ed25519 Authentication │
│ 2. Scoped Sudo Operator Accounts (Least Privilege)         │
│ 3. Ingress Network Perimeter (UFW Default Deny)             │
│ 4. Automated Brute-Force Defense via Fail2ban               │
│ 5. Automated Security Patch Deployment                      │
│ 6. Shared Memory Protection (/tmp and /dev/shm)             │
│ 7. Network Socket Auditing & Daemon Minimization            │
│ 8. Kernel Network Stack Hardening via Sysctl                │
└─────────────────────────────────────────────────────────────┘
Step 1: Deploy Cryptographic SSH Keys and Forbid Direct Root Access
Text-based password authentication is inherently vulnerable to automated dictionary attempts. Industry standards mandate adopting modern public-key cryptography (such as Ed25519 or RSA 4096-bit) and completely disabling direct remote logins for the administrative root user.
- Generate a cryptographic key pair on your administrative workstation:
ssh-keygen -t ed25519 -C "[email protected]" - Transmit the public key component to the target server:
ssh-copy-id -i ~/.ssh/id_ed25519.pub sysadmin@SERVER_IP - Update the SSH daemon configuration in
/etc/ssh/sshd_config:# Forbid direct remote root logins PermitRootLogin no # Eliminate password authentication PasswordAuthentication no PermitEmptyPasswords no # Constrain failed authentication attempts MaxAuthTries 3 # Optional: customize listening port to reduce automated noise Port 2222 - Verify syntax correctness with
sshd -t, then restart the service:sudo systemctl restart sshd
Operational Tip: Always establish a second, concurrent SSH connection in a fresh terminal window to confirm your key authentication functions before closing the current active session.
Step 2: Separate Daily Administrative Roles (Principle of Least Privilege)
Performing routine operations directly as root heightens the risk of accidental command errors that can impair file systems. Create designated administrative accounts and grant elevated permissions strictly via sudo:
# Provision designated operator account
sudo adduser sysop

# Associate account with the sudo privilege group
sudo usermod -aG sudo sysop
Under this model, each administrative command is attributed in system audit logs to an identifiable individual account, supporting transparent internal governance.
Step 3: Enforce a Strict “Default Deny” Host Firewall (UFW)
Network ingress must be closely regulated. Establish a baseline policy wherein all incoming connections are blocked by default, explicitly whitelisting only those ports required to serve production traffic:
# Establish baseline firewall policies
sudo ufw default deny incoming
sudo ufw default allow outgoing

# Whitelist administrative SSH access (e.g., port 2222)
sudo ufw allow 2222/tcp comment 'Administrative SSH Access'

# Whitelist HTTP and HTTPS for web application traffic
sudo ufw allow 80/tcp comment 'Public HTTP'
sudo ufw allow 443/tcp comment 'Secure HTTPS'

# Activate firewall rules
sudo ufw enable
Ensure that sensitive database ports—such as MySQL (3306) or PostgreSQL (5432)—never bind to public network interfaces (0.0.0.0), binding solely to local loopback (127.0.0.1) or private virtual private cloud (VPC) subnets. For organizations managing multi-node topologies, pairing host firewalls with enterprise Managed Firewall edge appliances provides robust defense-in-depth.
Step 4: Mitigate Automated Probing with Fail2ban
To shield server resources from continuous automated authentication sweeps, install Fail2ban. This utility dynamically monitors authorization logs and automatically injects temporary packet-drop firewall rules against IP addresses exhibiting repeated authentication failures:
# Install Fail2ban package
sudo apt update && sudo apt install -y fail2ban
Create a tailored local jail configuration in /etc/fail2ban/jail.local:
[DEFAULT]
bantime  = 1h
findtime = 10m
maxretry = 3

[sshd]
enabled = true
port    = 2222
logpath = %(sshd_log)s
backend = systemd
Initialize the service via sudo systemctl enable --now fail2ban. You can review blocked IP addresses at any point using sudo fail2ban-client status sshd.
Step 5: Automate Critical Security Patching (unattended-upgrades)
The overwhelming majority of security incidents exploit known vulnerabilities where official upstream patches have already been published. Automating the ingestion of security-specific packages ensures that critical CVEs are resolved systematically:
sudo apt install -y unattended-upgrades update-notifier-common
sudo dpkg-reconfigure --priority=low unattended-upgrades
Confirm that inside /etc/apt/apt.conf.d/50unattended-upgrades, the security archive line ("${distro_id}:${distro_codename}-security";) is un-commented. This protects your operating system from zero-day exposure without disturbing third-party business dependencies.
Step 6: Restrict Permissions on Shared Temporary Directories (/tmp and /dev/shm)
By default, /tmp is world-writable to allow applications to store transient data. To prevent unauthorized binaries or scripts from executing within these directories, append restrictive mount attributes in /etc/fstab:
tmpfs /tmp tmpfs defaults,noexec,nosuid,nodev 0 0
tmpfs /dev/shm tmpfs defaults,noexec,nosuid,nodev 0 0- noexec: Prohibits direct binary execution from within the directory.
- nosuid: Blocks unauthorized privilege escalation via the SUID bit.
- nodev: Restricts the creation of special block or character devices.
Step 7: Audit Open Sockets and Decommission Redundant Services
Reducing active background daemons directly curtails the host’s overall attack surface. Periodically inspect listening network sockets:
sudo ss -tulpnIf legacy or unneeded system daemons are discovered (such as printer queues or remote procedure call tools), disable them promptly:
sudo systemctl stop service_name
sudo systemctl disable service_name
Step 8: Tune Kernel Network Security via Sysctl
Refine Linux kernel network parameters in /etc/sysctl.d/99-security.conf to reinforce the network stack against forged packets and SYN flood exhaustion:
# Mitigate TCP SYN Flood resource exhaustion
net.ipv4.tcp_syncookies = 1

# Prohibit acceptance of ICMP redirect packets
net.ipv4.conf.all.accept_redirects = 0
net.ipv6.conf.all.accept_redirects = 0

# Prevent sending ICMP redirect messages
net.ipv4.conf.all.send_redirects = 0

# Defend against IP spoofing via Reverse Path Filtering
net.ipv4.conf.all.rp_filter = 1
net.ipv4.conf.default.rp_filter = 1

# Disregard ICMP broadcast ping requests
net.ipv4.icmp_echo_ignore_broadcasts = 1
Apply the updated kernel parameters without rebooting by invoking sudo sysctl --system.
Aligning Security Hardening with Data Protection Regulations
In enterprise environments, system hardening is not merely an internal engineering task; it is also a cornerstone of regulatory compliance. International data protection laws, as well as Indonesia’s Personal Data Protection Law (UU PDP No. 27/2022), require data controllers to implement demonstrable operational and technical safeguards to secure personal data against unauthorized access.
Aligning operational procedures with verified benchmarks such as the CIS Linux Benchmarks and Ubuntu Server Security Documentation provides auditable evidence of rigorous governance and organizational due diligence.
Sustaining Infrastructure Defense as an Ongoing Process
While baseline hardening establishes a resilient perimeter, infrastructure defense is an ongoing operational commitment:
- Round-the-clock monitoring of network metrics and telemetry anomalies.
- Timely rotation of SSL/TLS certificates and access credentials.
- Coordinating security patches within established server uptime SLA frameworks.
For enterprises seeking to focus internal teams on core software innovation, partnering with a dedicated infrastructure provider ensures that servers remain continuously patched, monitored, and maintained to the highest enterprise standards.
Looking to verify that your production cloud servers adhere to enterprise security benchmarks? PT. Satu Pintu Digital offers professional Managed Server and Managed Firewall solutions designed to protect your operational assets through 24/7 telemetry monitoring, scheduled vulnerability patching, and technical compliance management.
Read the sources
References and documentation
- CIS Linux Benchmarks — Center for Internet Security Industry-standard benchmarks detailing security baselines and hardening configurations for enterprise operating systems
- Official Ubuntu Server Security Documentation Canonical's technical documentation covering access control policies, firewall management, and automated security patching
Frequently asked
Questions teams ask before implementation
- Why do freshly provisioned cloud servers immediately receive connection attempts from the internet?
- Public IPv4 address blocks are perpetually surveyed by automated bots scanning for standard exposed ports. Implementing security hardening immediately upon provisioning equips the operating system with essential baseline defenses against unsolicited automated sweeps.
- Is shifting the default SSH port sufficient to secure administrative access?
- Changing the SSH port to a non-standard port reduces ambient scanning noise in authentication logs. However, true cryptographic resilience depends on disabling password logins and mandating robust public-key cryptography.
- How can engineering teams automate security updates without disrupting production dependencies?
- By configuring automated update utilities (such as `unattended-upgrades`) specifically to track security-only repositories (`-security`), critical vulnerabilities are mitigated automatically without triggering disruptive application dependency upgrades.
- How does server hardening support statutory compliance requirements?
- Modern data privacy statutes mandate that data controllers implement proportionate technical measures to protect sensitive consumer information. Maintaining formal server hardening records serves as auditable proof of due diligence.
This article is part of Satu Pintu Digital's field notes. The next article covers a related topic.
Keep reading